Nowadays, slideshows have become an integral part of any occasion. With the development of modern technology and our access to enormous amounts of information, the ability to clearly and concisely illustrate key information is an invaluable skill. Not a single project can now happen without slideshows at the workplace, school, or university. Moreover, they are an important and impactful keepsake for any big day such as graduation, wedding, etc. Overall, slideshow software is a handy tool to have these days since it helps users reduce the creation time.
Best Ways to Create a Slideshow – Step by Step
Below, we will discuss how to create a slideshow on a PC with three programs: Microsoft Photos, SmartSHOW 3D, and MAGIX Photostory Deluxe. We have included in our rating the usability of each software, their available features, and major pros and cons.
1. Microsoft Photos
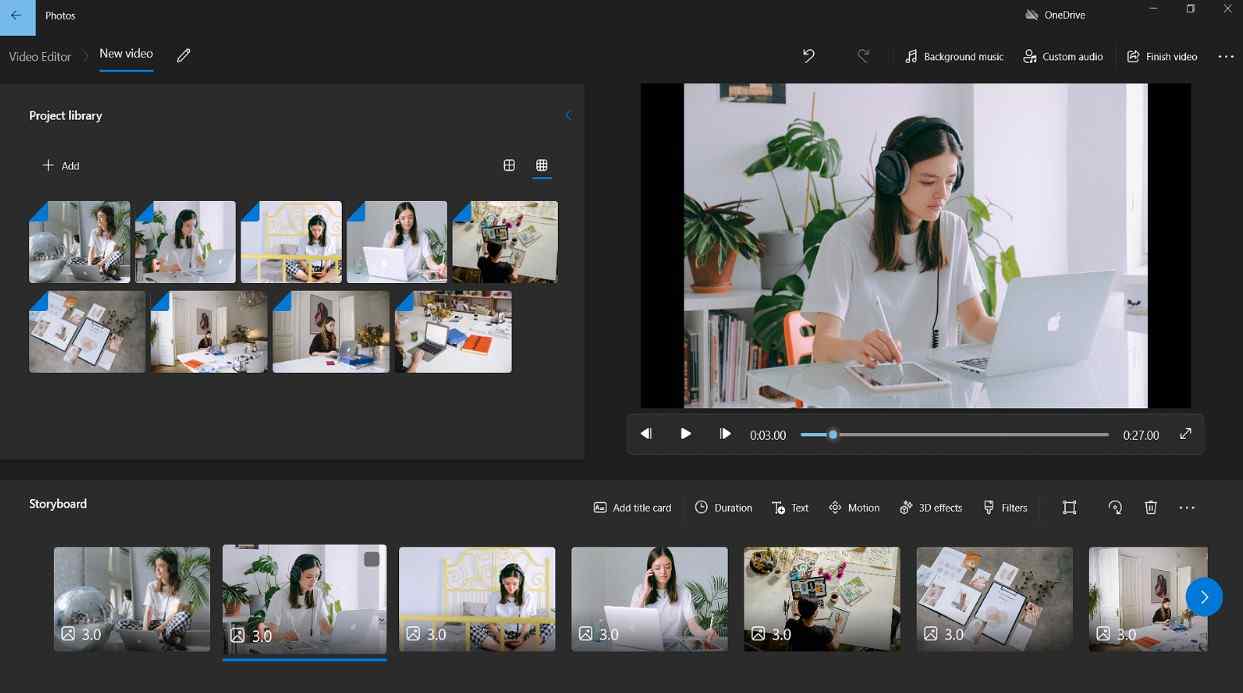
 This software comes pre-installed on the newest Windows versions. An in-program Video Editor allows you to make quick and basic slideshows without the need to install anything on your PC.
You can combine pictures, video recordings, and music into a unique slideshow video. You also have access to fun animation and 3D effects to apply with a simple drag and drop. However, Storyboard is quite cumbersome since it has no playhead (all video editors have it on the timeline), and clips of different lengths look the same.
Pros
- Very simple interface
- Comes bundled with your computer
Cons
- No choice of output formats
- No templates and a voice recording option, plus a limited set of tools
- Confusing Storyboard
Step-by-step guide
1st Step: Open Microsoft Photos and switch to the Video Editor tab. Create a new video project.
2nd Step: Add your images from the folder on your computer, a connected device, or from your cloud storage (OneDrive) into the software.
3rd Step: Drag and drop the pictures into the Storyboard. Adjust each slide duration, add motion and 3D effects, apply filters, and write titles.
4th Step: Choose one of the built-in tunes or upload a custom one.
Final Step: Save the slideshow as a video file on your PC after selecting its output quality.
2. SmartSHOW 3D
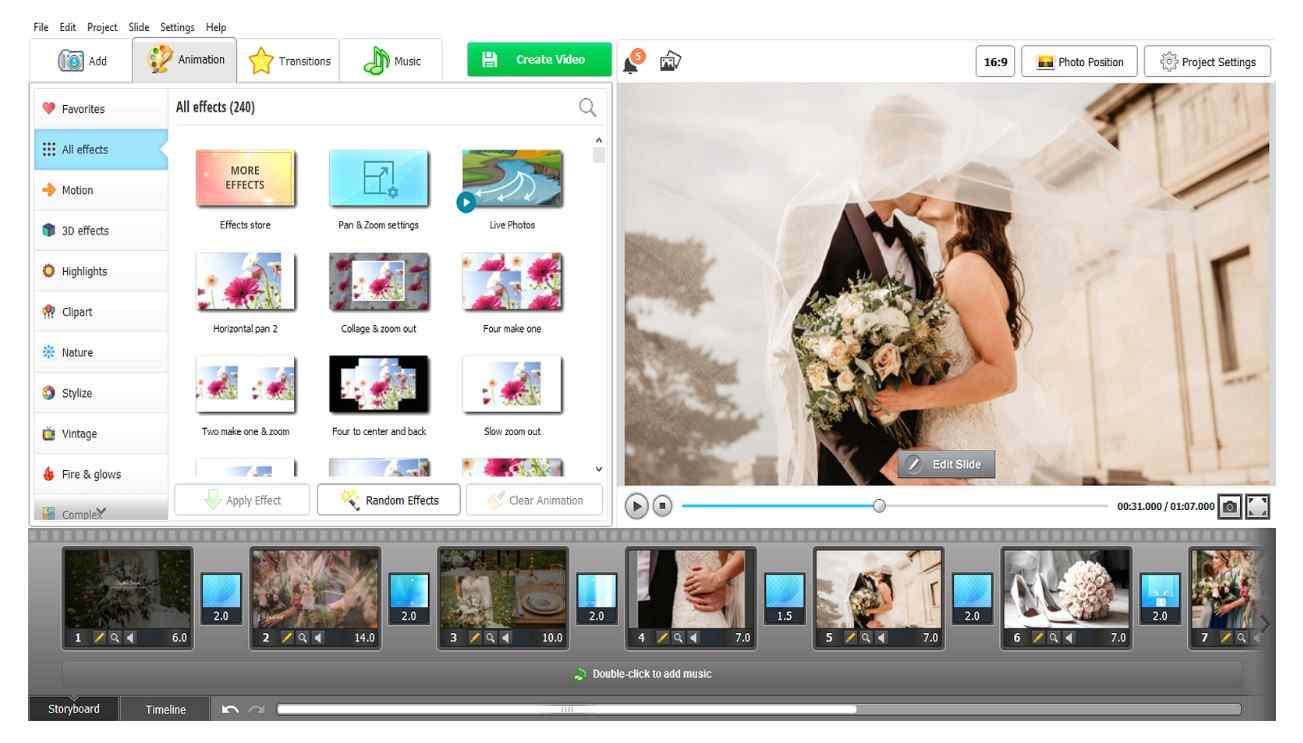
 Another program to make a slideshow on a computer is packed with advanced-level tools that are easy to use even for newbies in this field. Create slideshows hassle-free with a rich collection of templates for any occasion (wedding, graduation, birthday, Christmas, vacation, etc.) and the help of Slideshow Wizard, or build them from scratch by applying various transitions, effects, music tracks, and voice over narrations. Export your creations in popular formats such as MP4, AVI, MKV, MPEG, and HEVC, or optimize them for downloading to gadgets, posting on websites, or burning on DVD. The only downside is that if you generate a lengthy slideshow it may cause a slower performance of the program.
Pros
- Clear and intuitive workflow
- 700+ templates, special effects, and transitions
- 200+ soundtracks in the built-in music library
- Export in any HD video format or burn on DVD
- Smartphone-optimized and web-optimized output formats are available
Cons
- Larger projects slow down the software’s performance
Step-by-step guide
1st Step: Download, install and launch SmartSHOW 3D on your computer.
2nd Step: Choose the “Slideshow in 5 Minutes” option to create a slideshow automatically. Pick one of the templates you like from its huge ready-made collection.
3rd Step: Upload your photographs to the window that pops up. You can rely on the recommended number of photos specified at the bottom of the window, or add as many as you like.
4th Step: Select background music from the in-program soundtrack library or upload the song from your PC folder.
5th Step: Make final adjustments by adding a title and final words. Change the duration of each slide and preview your creation.
Final Step: Save your slideshow in the necessary output format (for TV, DVD, social networks, and mobile devices).
Follow the link to discover a detailed tutorial on how to make a slideshow on a computer if you have some spare time and are confident in your skills to build a slideshow from scratch without the help of Slideshow Wizard.
3. MAGIX Photostory Deluxe
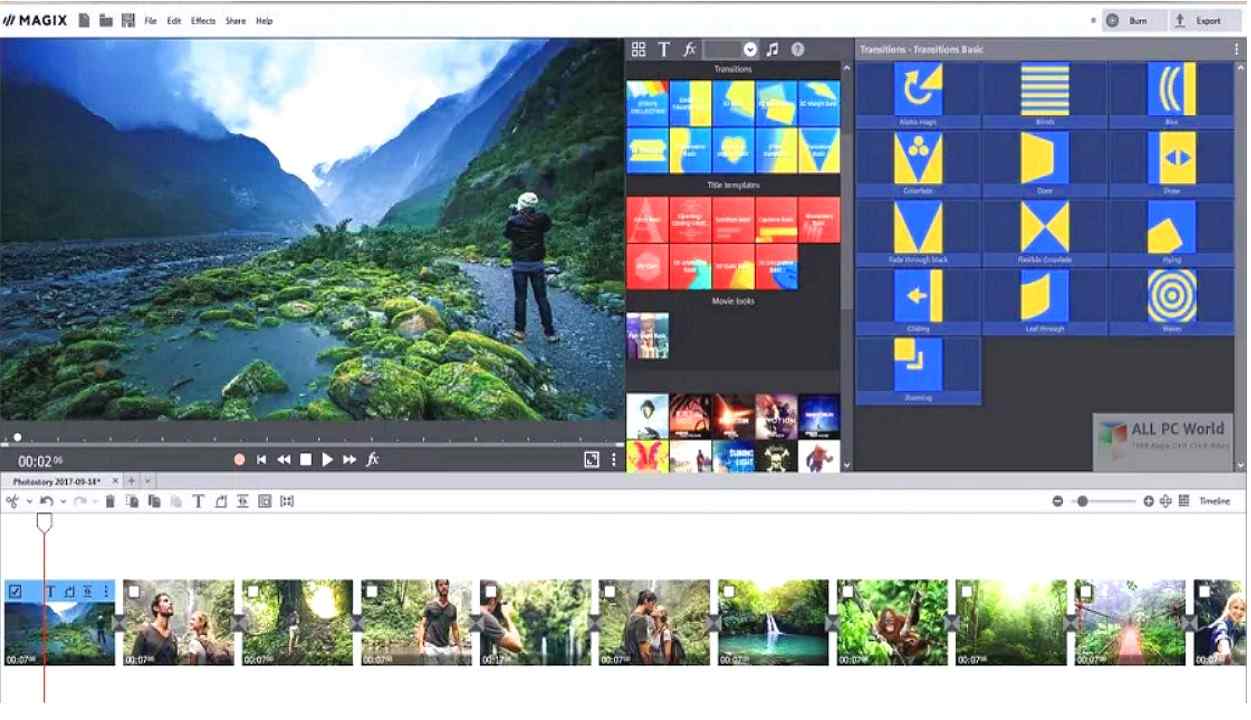
 This program comes with cutting-edge features for building fascinating slideshows. You can enhance your photos and videos in one click, add music and sound effects from the built-in library, and create animated travel routes. Your creations can be easily optimized for any device with a variety of export formats. However, it is suitable for users with video editing experience because of a rather complex and hard-to-use workflow.
Pros
- Simple video creation with Photostory Wizard
- Has a picture-in-picture feature for creating photo collages
- Huge collection of effects and transitions
- Supports various export formats (PC, mobile devices, web, and DVD)
Cons
- No templates for creative slideshows
- Quite complicated interface
- Not compatible with older versions of Windows, only requires Windows 10 or 11
Step-by-step guide
1st Step: Run the software after installing it on your computer.
2nd Step: Select the New Photostory option to create a slideshow with the help of Photostory Wizard.
3rd Step: Upload the pictures you want to include in your slideshow and click the Create Photostory button.
4th Step: Pick a soundtrack template for background music, add text for the intro, and modify the duration of each slide with a slider.
Final Step: If you’re satisfied with your final creation, export it as a video file, or continue editing it in the main interface.
Final Thoughts
Slideshows have become a necessity for businesses and individuals in today’s world. After a lengthy review of three slideshow-making programs – Microsoft Photos, SmartSHOW 3D, and MAGIX Photostory Deluxe – you now know about their advantages and disadvantages, their differences, as well as have a step-by-step guide on how to make a slideshow on a PC using each of them. We hope this article helps anyone easily find a slideshow software that fits their needs and skillset.
That’s all for today! Thank you.


